
table of contents
Prerequisites
Equipment or Location will need the designated CML (Condition Monitoring Location) template assigned to it. For example, CML for vessels, Cathodic Protection, RTs, etc…
See “Template Management” for more information on this topic.
Purpose of the Condition Monitoring Location (CML)
The purpose of the CMLs are to define “Locations” against the asset for tracking attributes, readings, and further perform analysis such as Corrosion Rates or Resistivity algorithms.
Anatomy of a Condition Monitoring Location
CMLs are templatized and therefore versatile in what types of data that can be tracked, however, the general data tracking is:
Taxonomy - Equipment or Location the CML is assigned too.
Definition Header - Name, Description, Template assigned
Definition Data - Attributes, such as Date in Service, Diameter, etc....
Readings - Numeric data stored against the CML for analysis.
Creating CMLs
Step 1 - Navigation to the Equipment or Location App, depending on which SAP data object you would like to persist the CML against.
Step 4 – The Equipment App will display with a CML tab for adding and managing existing CMLs.
Step 1 – Navigate to the CML tab within the CML App.
Step 2 – Tap the “+” button to add a new CML.
Step 2 – Provide the following inputs to calculate a Tmin and MAWP calculation
Step 3 – Tap the “Calculate” button and the Tmin and MAWP will calculate. Tap “save”.
Editing CMLs
To edit, or change values of the CML, follow the below steps.
Step 1 - Navigation to the Equipment or Location App, depending on which SAP data object you would like to persist the CML against.
Step 2 – The Equipment App will display with a CML tab for adding and managing existing CMLs.
Step 3 – Navigate to the CML tab within the CML App.
Step 4 - Select the CML you would like to change. You can alter the following:
Definition Header - Name, Description, Template assigned
Definition Data - Attributes, such as Date in Service, Diameter, etc....
Assigning CMLs to an Inspection
Step 1 – Using your skills learned in Day 1, create a new Inspection record against the same equipment used for creating the CML on.
Step 2 – On the Background Information, provide the “Date of Inspection”, any date is ok.
Step 3 – Tap the CML tab of the Inspection.
Step 4 – Tap the “Add CML” button to open the dialog and choose the CML template type of adding.
Step 5 – Choose the CML Template Type that was defined, “UT Cylindrical Shell ID Div 1” and the Persona of “Reading”.
Step 6 – Select the 001 Location to add to the Inspection, tap “Save”
Step 7 – Provide a value of .25 against the 001 CML, tap “Save”. If the Inspection Date is empty, provide the Inspection Date
Step 7 – Publish the Inspection.
Publishing the CML will commit the reading back to the CML. If there are any calculations, such as Short Term, Long Term Corrosion Rates and Remaining Life, they will be calculated.
Calculating Deterioration Rates
CMLs, of type Thickness measurements, will generate Corrosion Rates, Remaining Life, etc..calculations.
To calculate the Remaining Life data, you will need:
Tmin (thickness minimum) User Defined or Calculated.
Readings from the Inspection.
by default, you will need two readings to calculate remaining life. However, if there is one reading, the Nominal Thickness and Date in Service will be used for the base readings.
Below are the algorithms used for Short Term, Long Term, and Half Life calculations.
Short Term (ST) Corrosion Rate = (Previous Reading - Current Reading)/(Current Date - Previous Date)
Long Term (LT) Corrosion Rate = (Original Reading - Current Reading)/(Current Date - Original Date)
Remaining Life = (Current Reading - Tmin) / (Greater of LT or ST Corrosion Rate)
Retirement Date (Half Life) = (Remaining Life/2) + Last Inspection Date
Calculating Corrosion Rates are performed with the Inspection with the CML is Published, however you can always calculate the information on the CML with the below steps.
Step 1 - Navigation to the Equipment or Location App, depending on which SAP data object you would like to persist the CML against.
Step 2 – The Equipment App will display with a CML tab for adding and managing existing CMLs.
Step 3 – Navigate to the CML tab within the CML App.
Step 4 - Select the CML you would like to change.
CML History
History of the CML is shown on the same tab as the deterioration rates.
Step 1 – Navigate back to the equipment CML App and find the equipment you have been working on, select it.
Step 2 – Tap the history tab and the reading history will be displayed.
Note: In this case, there is only one reading. As more readings are added, the corrosion rates and half life will calculate.
Overall Readings
As the history is calculated on the individual CML level, it is aggregated at an overall Equipment, Component, or Location level. It can be seen on the Overall Readings tab.
Step 1 - Navigation to the Equipment or Location App, depending on which SAP data object you would like to persist the CML against.
Step 2 – The Equipment, or Location, App will display with a Overall Readings tab for viewing the complete history defined for the template.
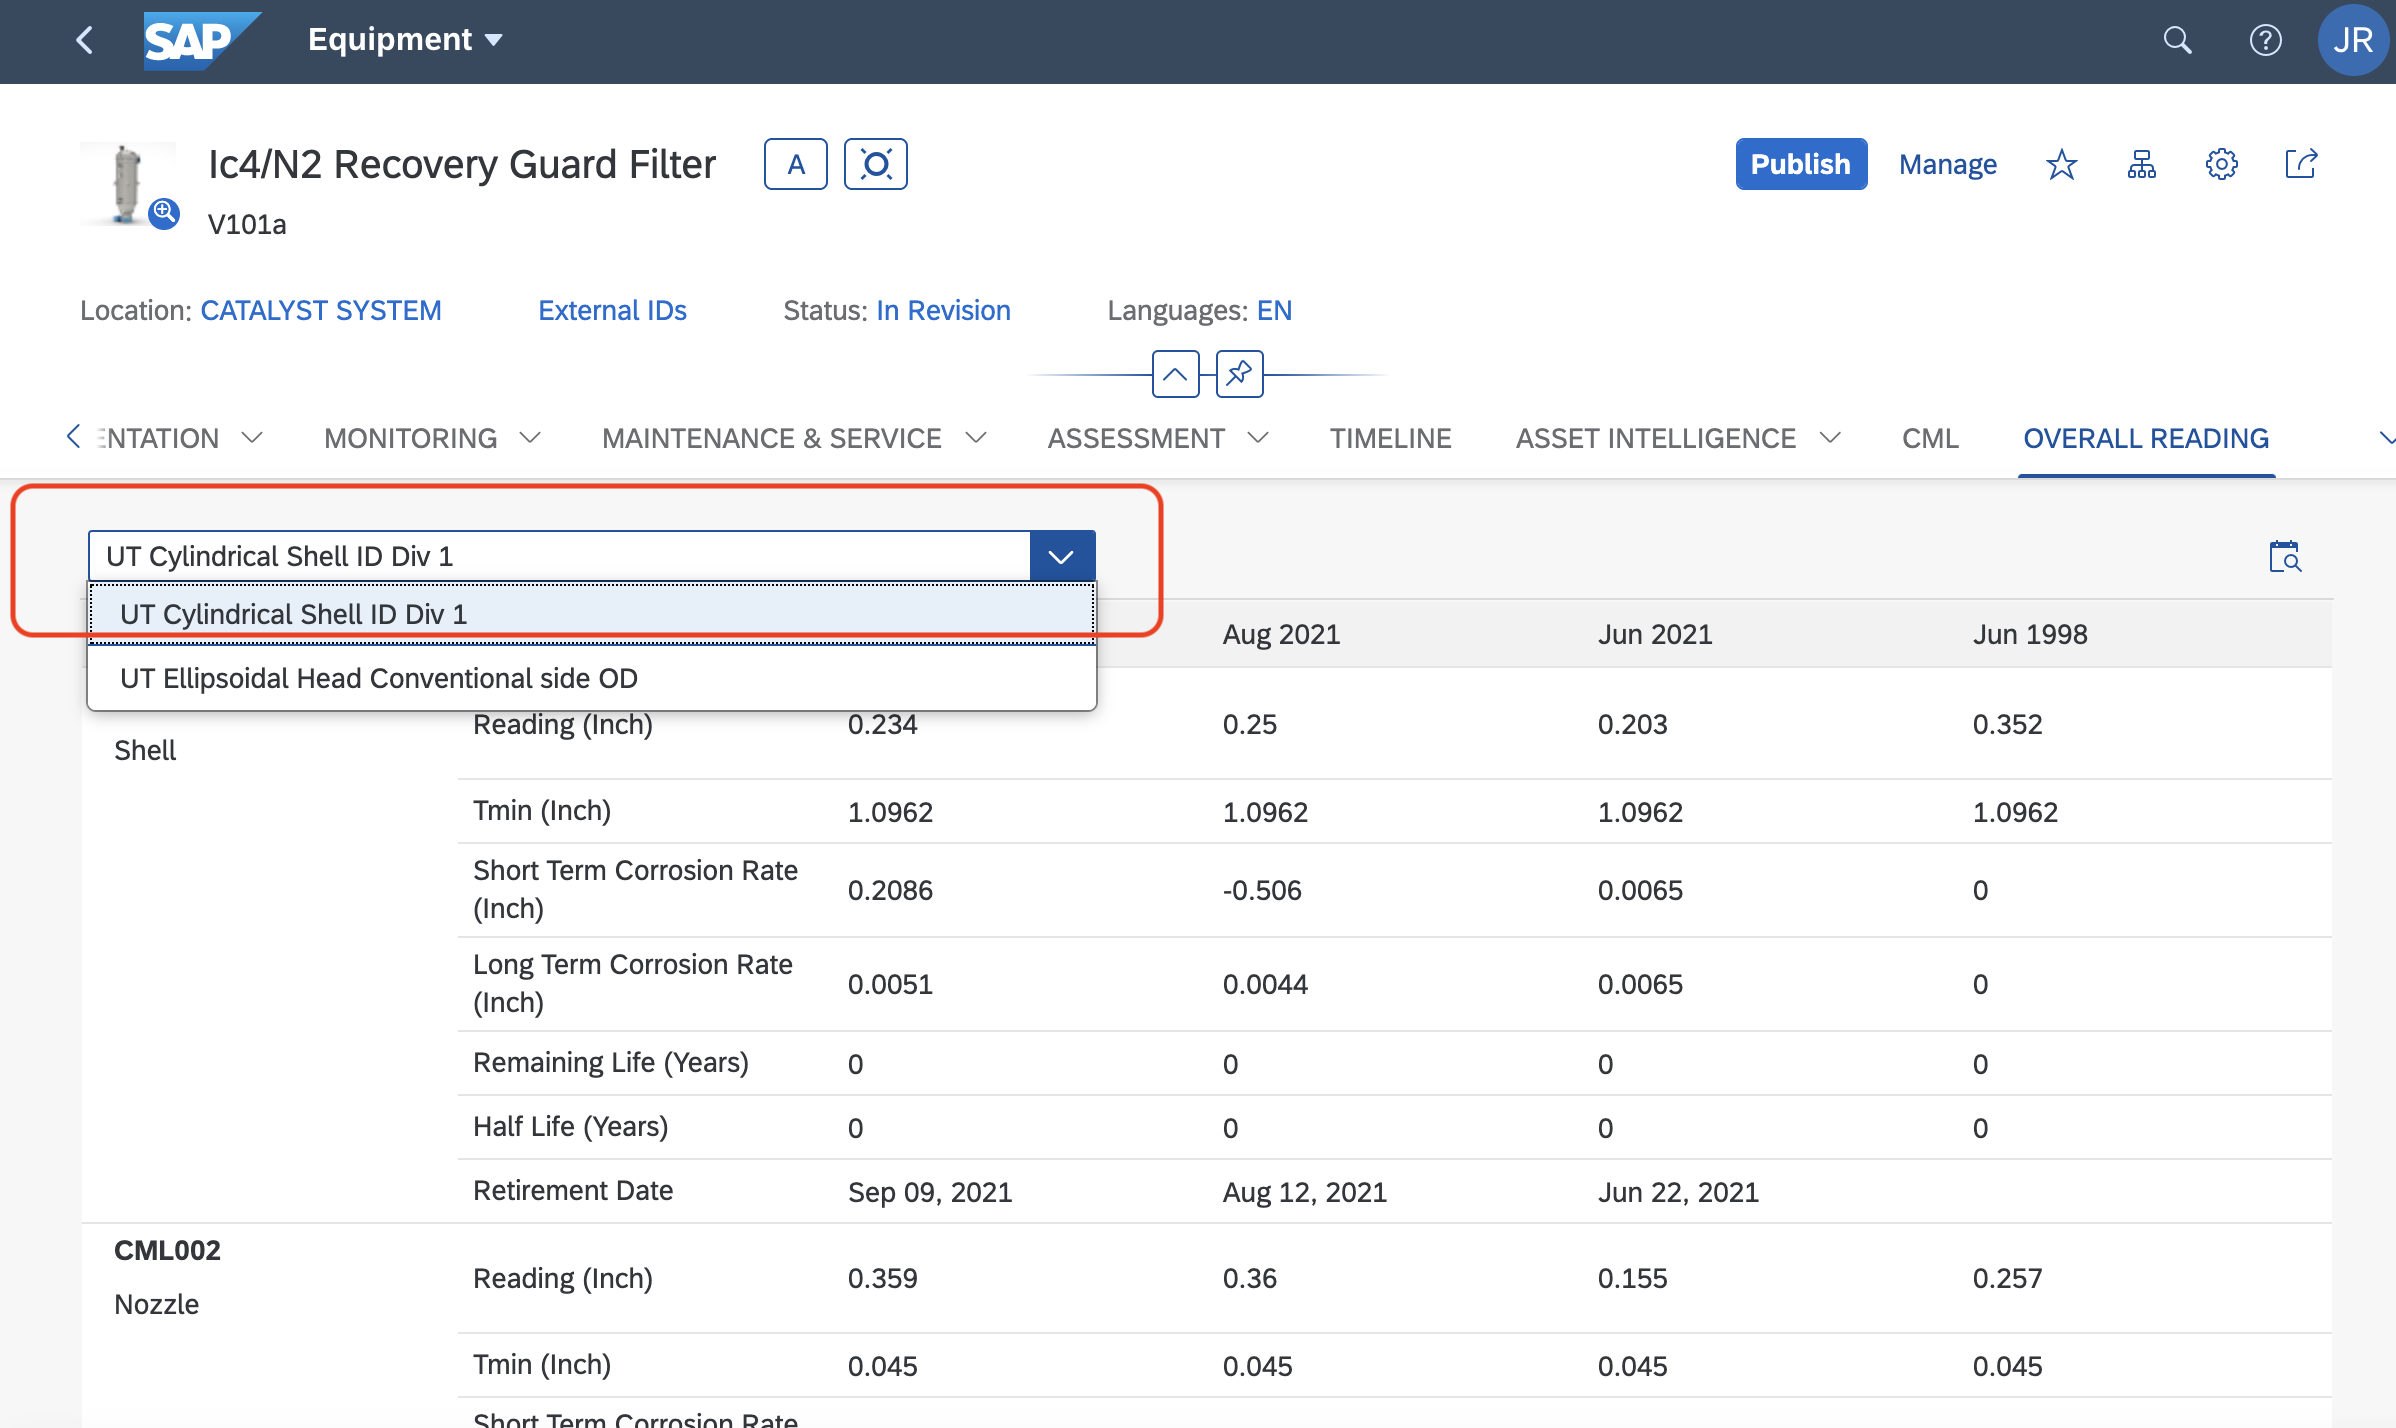
Tap to enlarge image
Step 3 – Select the template to view.

Tap to enlarge image
Step 4 - You can change what readings are to be plotted as well.
Cloning CMLs
The CML Tab in Equipment/Location will show the list of CML(s). By using this clone feature the user can clone the CML(s) with in the same Equipment/Location or to a new Equipment/Location. To clone, at least one CML should be selected. If not selected, then the below error message will be shown.
After selecting, click on the button next to search field. It will show to options – Copy to This Asset, Copy to New Asset. For Location, the options will be – Copy to This Location, Copy to New Location. If CMLs were already copied, then paste button will be visible or else it will not be visible.
If only one CML was selected, then it will be duplicated successfully. Except history all other values will be moved to the duplicated CML. The naming convention of the duplicated item will be as follows –
· If user selects A-BC, then the name of the new CML will be A-BC(1).
· If the user selects same A-BC again then the new CML will be A-BC(2) as A-BC(1) already exists.
· If user selects A-BC(1) then the new CML will be A-BC(1)(1).
At any given time, the CML name (name - description) will be unique. This applies to location too.